Today I will be showing a new technique that I have learned in soap making. It is called the "pencil line." This is the first time I have tried this, or any, technique actually. I have been learning how to make soap by process and have really only just begun. I am keeping my soaps simple by not bogging down that process with too many steps or too many ingredients. The potential for this technique to add design and texture to my soap is vast. I have already spent hours fantasizing the many ways in which I can use the pencil line to bring an avenue of 'interesting' into the finished product.
Before we begin with the soap, I would like to dedicate today's post to species extinction for two reasons.
1) Before making this soap, Mitch and I watched a compelling NOVA documentary on PBS called Extreme Ice about glaciers and the polar ice caps. The filmmakers were able to capture spectacular never before seen images of glaciers melting and calving to the sea through the use of time lapse photography. The program talked about the various animal species that depend on the ice for survival, such as Polar Bears, Fur Seals, and the Arctic Fox, and how a recent rise in average global temperatures threatens the very existence of these highly adapted creatures. They are on the verge of extinction.
and
2) I made a total dodo brained move in this latest batch of soap! The Dodo Bird is the epitome of species extinction in that it has occurred during recorded human history, and its demise is largely attributed to the direct acts of humans. Indigenous to the island Mauritius in the Indian Ocean, the Dodo bird lacked any natural predators thus loosing its ability to fly. According to Wikipedia, the Dodo bird was first mentioned by Dutch settlers on the island in the late 1500's. 80 years later they had completely disappeared. http://en.wikipedia.org/wiki/Dodo. I do not mean to be insensitive to the demise of the poor bird, but I picked the Dodo bird for this homage because the word "dodo" in Portuguese means "fool" or "crazy."
So now....on to the pencil line!
A pencil line is where I attempt to make a thin dark line in between two layers of soap. I chose my oatmeal honey recipe because it has nourishing skin qualities and will go well with the pencil line of dark dutch chocolate powder. Did you hear that?? Honey, Oatmeal and Chocolate! What could go wrong?
Here is my kitchen table all set up to make this batch. I have everything I need within arms reach.

Here is the lye water. I mix my lye and water in a heat proof container and let it cool to room temperature, then I add the honey to the mixture. Honey has natural sugars which can burn in the lye and can also cause your soap to overheat and eventually burn while in the mold. I don't want to burn my honey before it goes into the soap oils, and I also want to make sure it has fully dissolved in the lye water. Doing it this way helps me to avoid certain catastrophes. Its a beautiful golden color!

Next, I measure out all the base oils I will be using for my recipe. This recipe uses Pomace Olive Oil (a beautiful green color), Coconut Oil, and vegetable shortening. Different oils have different properties in the finished soap. Coconut oil adds lather and a hardness to the bar, while olive oil and vegetable oils keep it gentle and mild.

I place the solid oils on my stove and over low heat, gently melt them to a temperature of 130 degrees Fahrenheit. The candy thermometer helps me find that gentle medium.

The coconut oil and vegetable oils are melting away, reminding me of the awesome glaciers and icebergs I saw in the Documentary Extreme Ice.

Once the oils have come up to temperature, I combine them with the olive oil that I had previously measured, making sure that the temp is at 130 degrees. Then its time to add the lye and honey water mixture. You can see the difference in the oils at the bottom of the pot once the lye has been added. Saponification is already happening.

I use a stick blender to continue to blend the oils until a trace is reached. Trace is a soap making term that means the soap leaves a trace of itself on the surface. I will mix this until I reach a medium trace. Then I will add the oatmeal.

Mixing away, the oils continue to become lighter in color and get thicker.

Once I have reached a medium trace its time to pour the first layer of soap into the mold. Here I am using my small batch silicone mold. It holds two pounds of finished soap. I don't have to line it, I can just peel the mold off of the soap once it is ready to be removed.

Now, its time to get creative!

Using a small strainer and a spoon, I will gently tap the dutch chocolate powder onto the surface of the first layer of soap, going all around until it is evenly coated, like this:

Being extra careful not to let the second layer of soap sink into the bottom layer and destroying the fine line of chocolate, I pour the second layer of soap over a spatula to help slow down the flow:
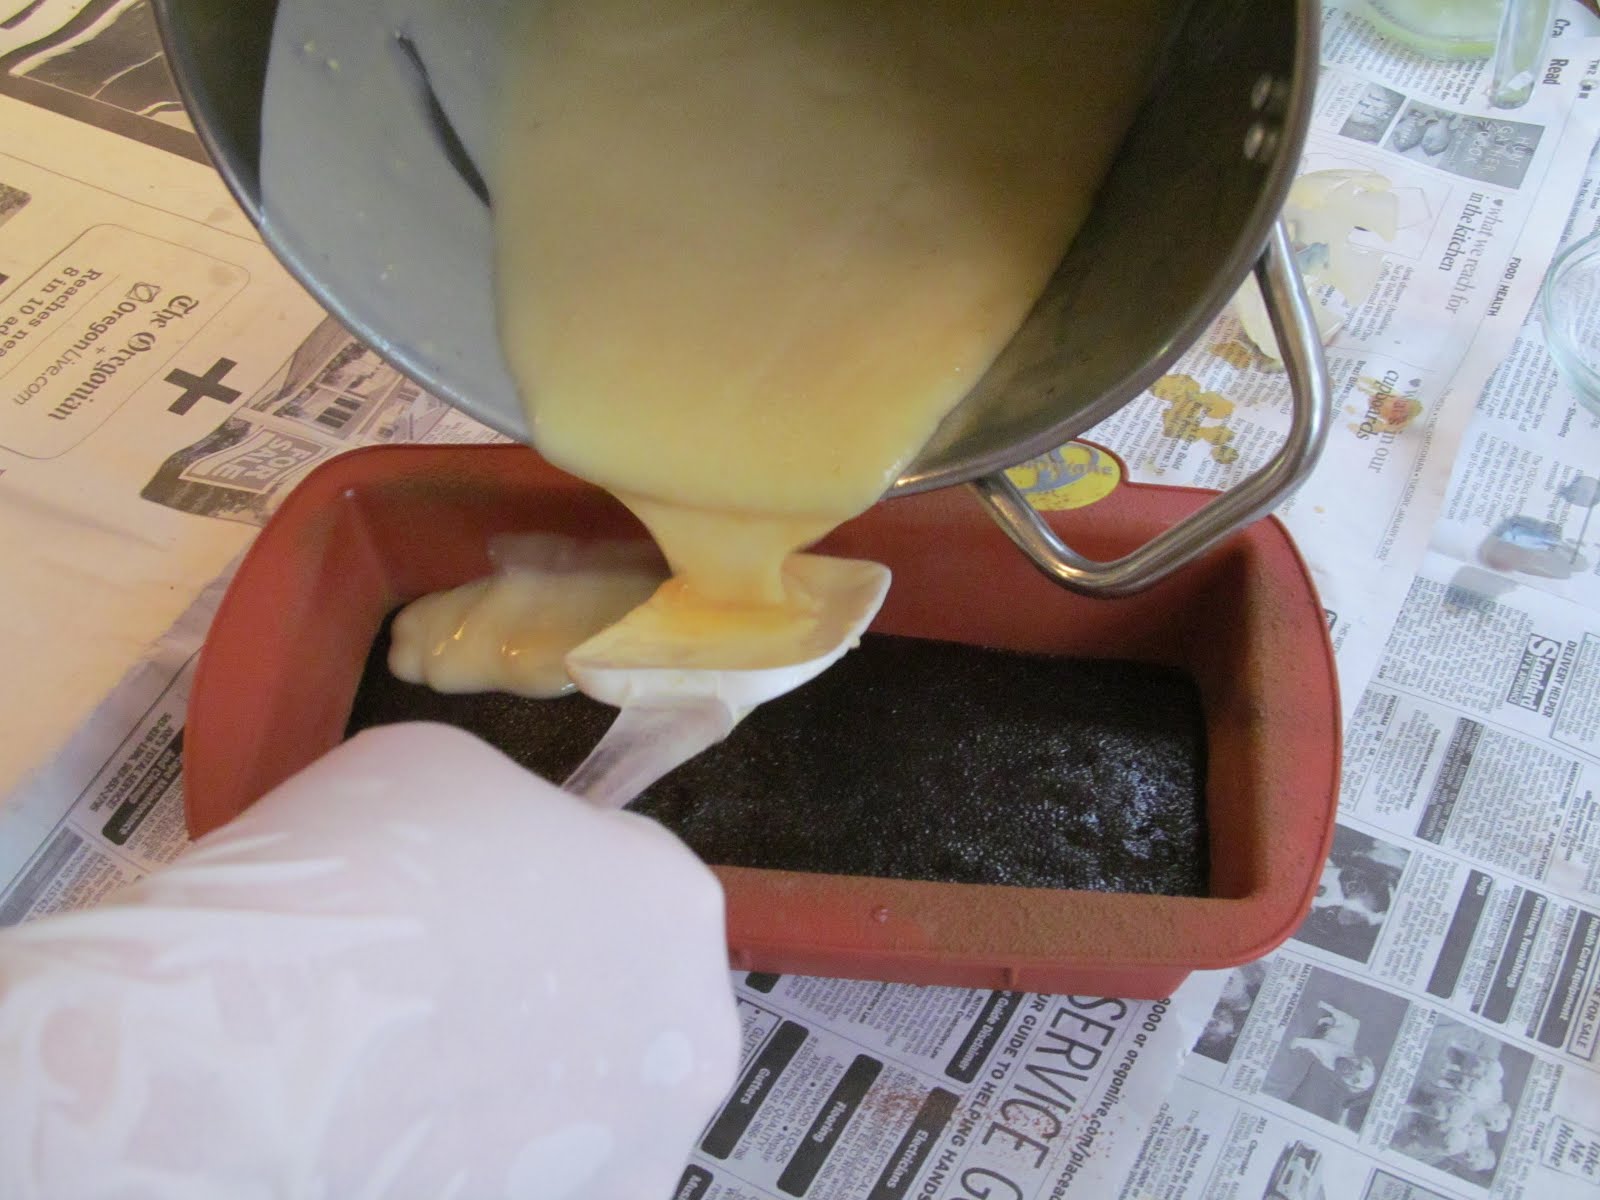
(this is the part I realized that I need some smaller containers. Pouring a large stainless steel stock pot full of warm and caustic materials with one hand while trying to control the other hand is painfully difficult.)
Fill up the mold completely with the rest of the soap.

I wrap the loaf in towels to insulate it while the lye continues to work with the oils to complete the saponification process. The soap will stay wrapped up for anywhere from 12-18 hours or more, then it will be removed and left to sit for another 6- 12 hours to harden a little bit so that its easier to cut. After being cut, the soap will still need to cure for another 4 weeks until it is ready to use.

Another batch! DONE! YAY!

Finally! The next day comes and I am so anxious to unwrap my soap and see what it looks like. I haven't peeked on it at all!
RELEASE THE DODO BIRDS!!!! *cue dramatic music*
Here is where I discover my "dodo" moment! While being generally proud of myself and feeling quite successful at having completed another batch of soap with a new technique and no complications, I opened my mold to find this:

and this:

WHAT HAPPENED???
This only having been my 6th batch of soap ever, I did not realize (understand, get, it, foresee, comprehend) that in my zest to keep things clean and tidy as I was finishing up this batch, I inadvertently put some heavy items on top of my soap mold while the soap was wrapped in the towels- completely thinking (or not thinking, actually) that it was safe to do so. It turns out that I squished my soap while it was still soft in the mold!
But, can you see that awesome pencil line?

RELEASE THE DODOS AGAIN!!!
It is at this point that I remembered that before I poured the second layer of soap over the pencil line, I had fully intended on taking a wet cloth and wiping down the inside of the soap mold, so that no color transfer would happen on the sides of the soap. My excitement for the end product got the best of my good intentions! The two layers of soap gelled completely, and it even looks like I achieved a two color gradation. I did not expect that to happen, I did not plan for that to happen. But, upon slicing the soap, I realize that it actually probably did not happen.

The inside of the cut loaf of soap you can see that the colors are the same, a milky whitish color. As the soap cures and more water evaporates, I expect the color will turn to a golden-yellow honey-hue and will smell absolutely divine. And.... I think the pencil line was a success! Don't you?

Here is the two pound loaf all cut up into somewhat equal bars. They are all a strange shape and they all have divots, pits, pock marks and variety in their thickness of pencil line. I still think that even a batch of soap that turns out not quite as expected can still be considered a work of art.
All in all, without my dodo bird moments , I think that the pencil line technique is a success, and I look forward to trying it in a much more controlled environment. I look forward to being able to create landscapes and various other textures as I work at perfecting this technique.
Thank you for joining me today in my post on the pencil line technique. Please feel free to leave comments or to subscribe to my blog.
Happy Washing Everybody!
I can not wait to see your landscape creations! I would call this batch a success. I look forward to reading more of your adventures in soap making.
ReplyDeleteHi Kristen! Thought I would stop by and check out your blog! I love the creamy color of your soap. Can't wait to hear how it works (the most important part!).
ReplyDeleteAlso, next time you might want to use a little less cocoa. Sometimes, if you use too much, it can cause the layers to separate. Not right away, necessarily, it can happen as you're using the soap! If you leave it a little more speckled looking, enough of the two layers of soap stick together so that it won't separate. And the line will still look awesome! (Plus, it saves money!!)
Hi Andi! I appreciate you taking the time to check out my blog and leave a comment. I really like this honey oatmeal recipe, all my friends have raved about it too. I love that I don't have to add any essential oils to make it smell good, it just smells good on its own! It's a good recipe to use to experiment with because I know that no matter how the soap ends up looking it will always be nice to use! And, thanks for the tip!
DeleteI think you did a great job on the pencil line. Your soap looks good.
ReplyDeleteI'm going to try this in the near future.
Thanks for visiting Linda! I look forward to checking out some of your creations as well!
ReplyDeleteThe article highlights the complexity of global food trade, but how can we balance vegetable cleaner with ethical sourcing? Sustainable alternatives and local food resilience matter. Check out Vegfruwash for a safer way to clean imported produce!
ReplyDelete